
This post may contain affiliate links. Please read our disclosure policy.
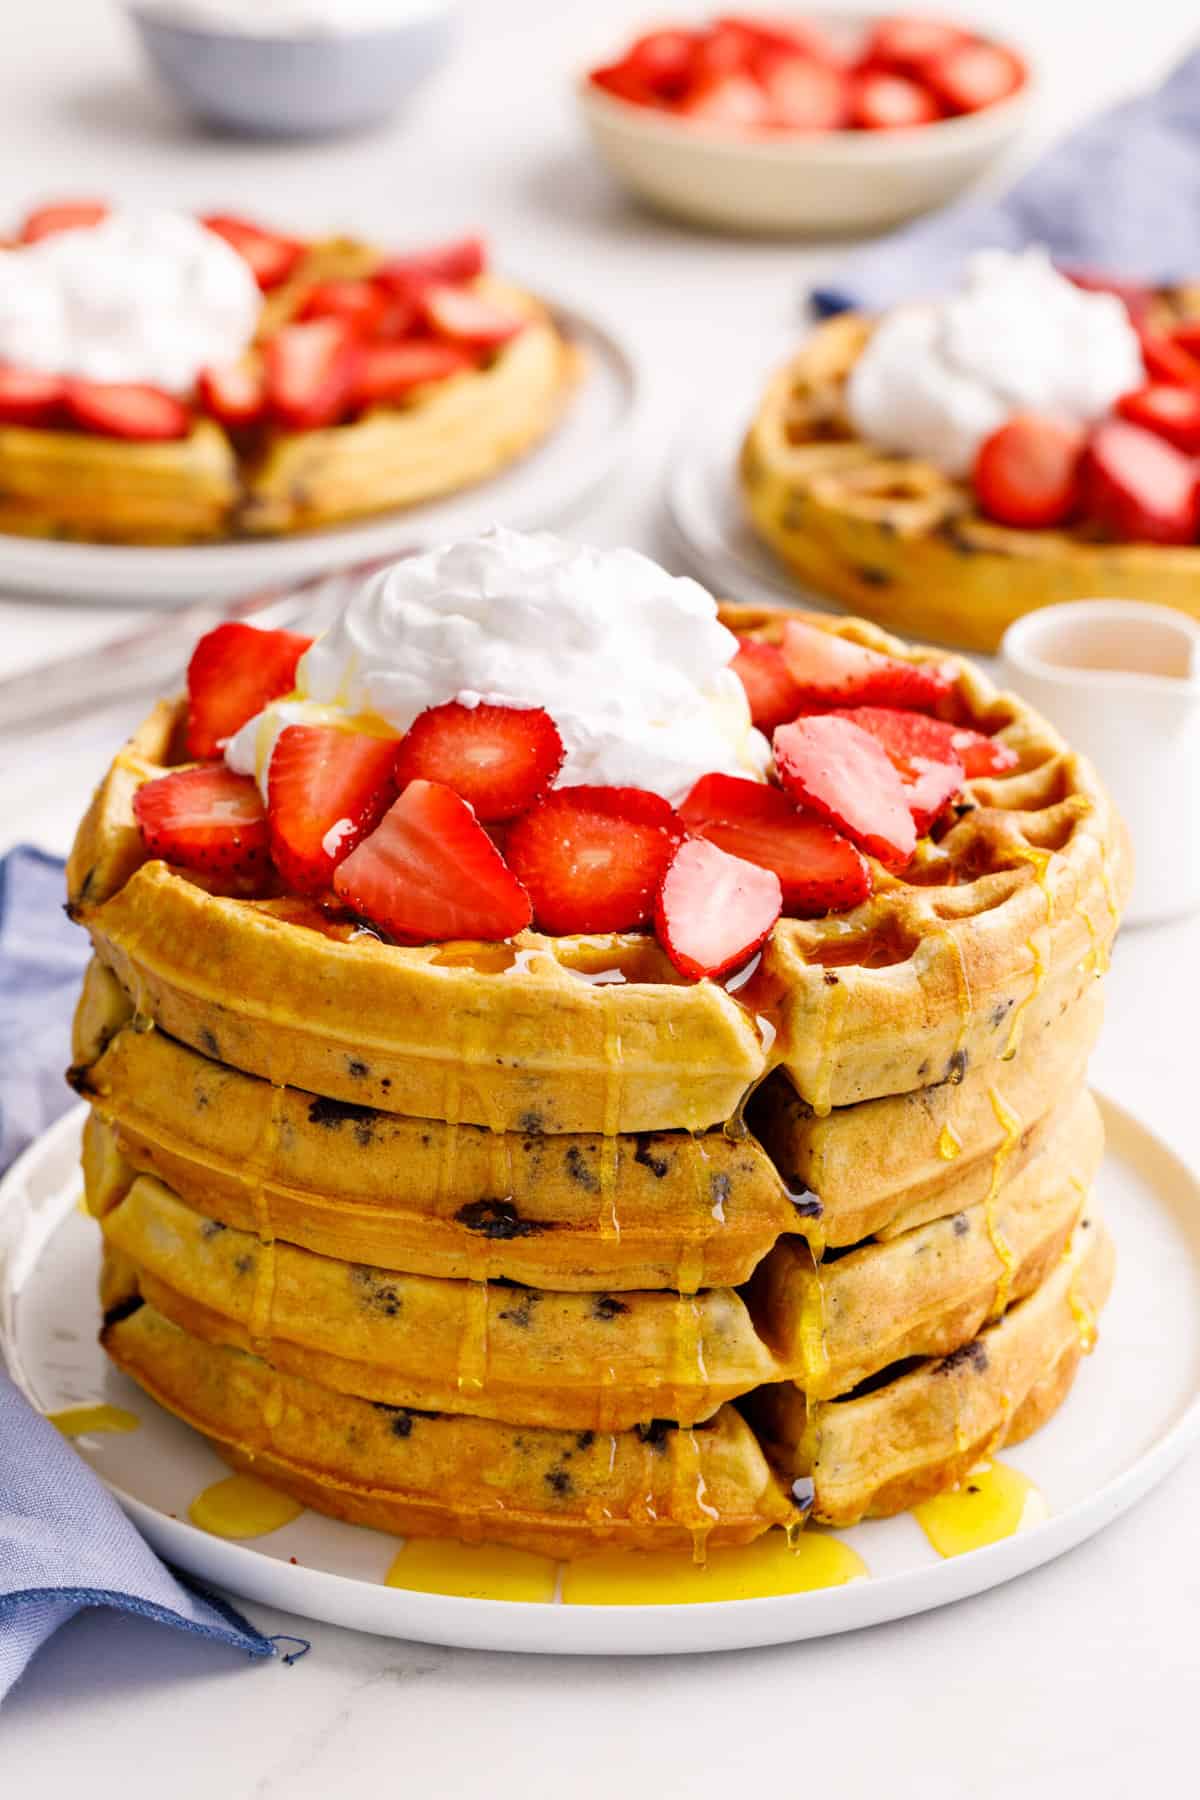
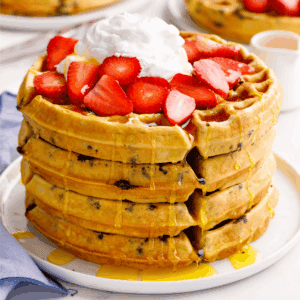
These chocolate chip waffles are everything you want in a cozy breakfast — fluffy on the inside, lightly crisp on the outside, and dotted with melty chocolate chips in every bite. This recipe is easy enough for busy mornings but special enough for weekends, birthdays, or breakfast-for-dinner nights.
If you’re looking for more homemade waffles that feel like a treat without being fussy, try my classic Waffle Recipe or Bisquick Waffles.
Why you’ll love this chocolate chip waffle recipe!

Making perfect waffles at home isn’t all that much more difficult than making pancakes. And the results are definitely worth it!
They’re fluffy, golden brown on the outside, slightly crispy on the edges, and loaded with chocolate in every bite. Oh yes, these waffles are good!
If you’ve made chocolate chip pancakes, you can totally make chocolate chip waffles, too. The recipe is practically the same—you make the batter and fold in the chocolate chips. Easy! The only difference is that instead of cooking them up on the stovetop, you’ll use your waffle iron.
Here are just a few reasons you’ll love them:
- They strike the perfect balance between crispy and fluffy. The outside cooks up golden and lightly crisp in the waffle iron, while the inside stays soft and tender, thanks to the right ratio of milk, eggs, and fat.
- Kids and adults both love them. The melty chocolate chips make these waffles feel like a treat, but they’re not overly sweet, so they still work as a classic breakfast everyone can agree on.
- They freeze beautifully for make-ahead mornings. You can double the batch, stash extras in the freezer, and reheat them straight from frozen for an instant homemade breakfast.
Table of Contents
Ingredients for Chocolate Chip Waffles
This recipe requires just a few pantry staples or ingredients commonly found in your kitchen.
The full ingredient list with measurements is in the printable recipe card below.
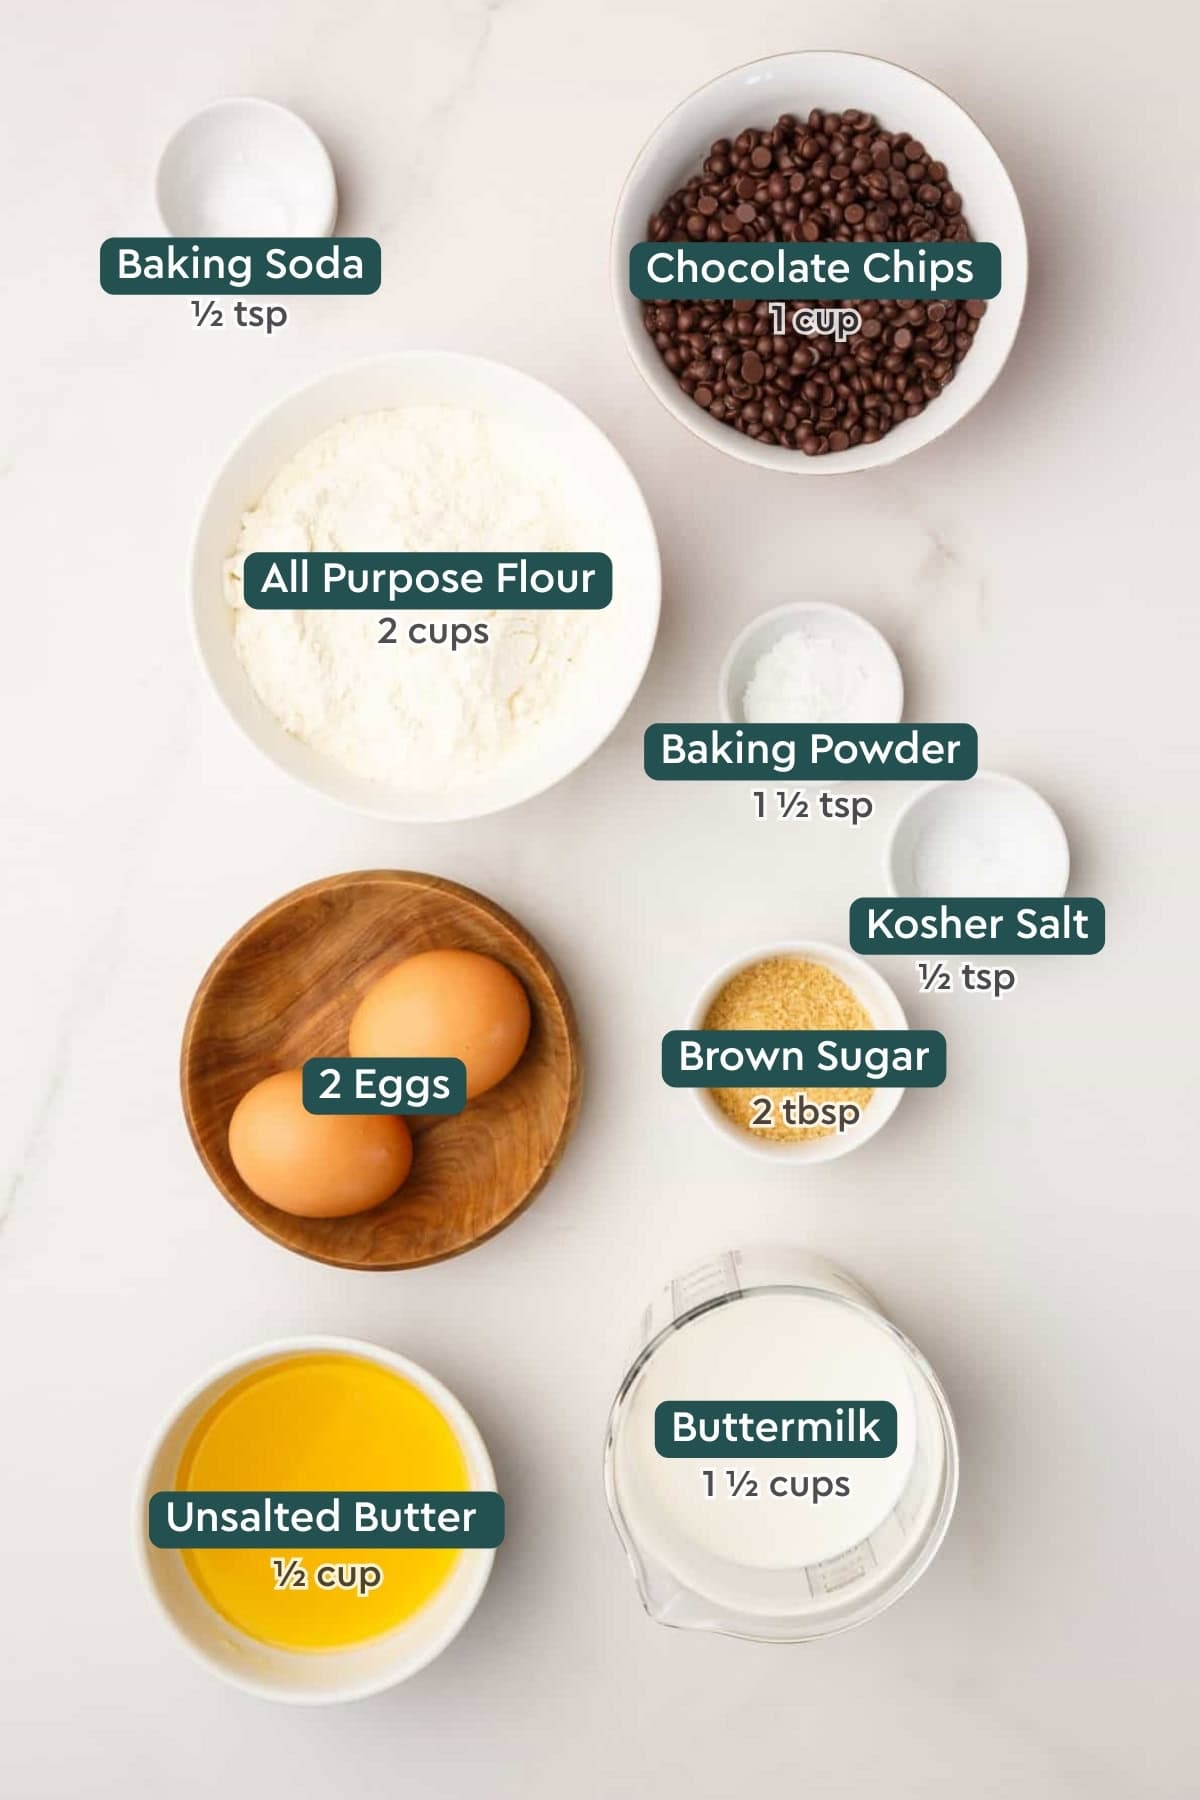
- All-purpose flour – Swap in a measure-for-measure gluten-free flour substitute to make these waffles gluten-free.
- Baking powder and baking soda – Always use fresh leavening ingredients for the best results.
- Brown sugar – Both light and dark brown will work here.
- Eggs – Here’s the best way to crack eggs.
- Buttermilk – You can make a buttermilk substitute, but store-bought buttermilk is best.
- Unsalted butter – Melt this before making the recipe.
- Chocolate chips – Miniature is preferable because you’ll get more chocolate in every bite.
Variations
- Add some cinnamon to the batter for a little bit of cozy flavor.
- You can also substitute the chocolate chips for other mix-ins like white chocolate chips, peanut butter chips, or even chopped candy bars.
- Substitute half the chocolate chips with chopped walnuts or pecans for some crunch.
- Take a shortcut and add chocolate chips to these pancake mix waffles.
How To Make Chocolate Chip Waffles
Homemade chocolate chip waffles come together in just a few steps!
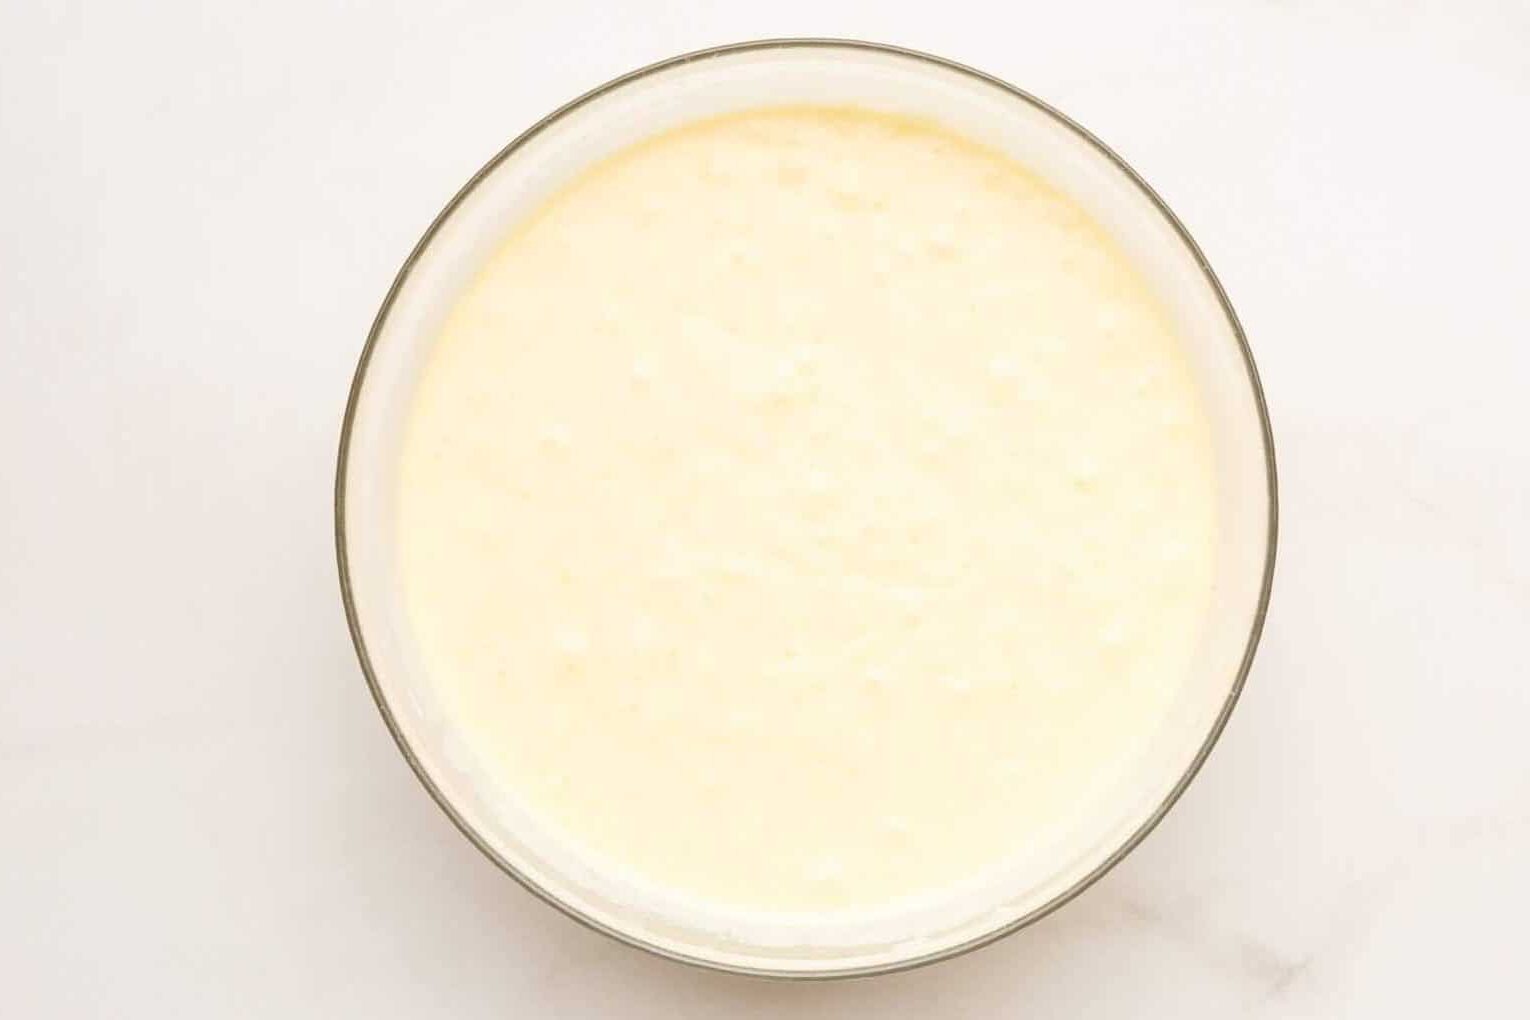
- Make the batter: In a medium bowl, whisk the flour, sugar, baking powder, baking soda, and salt. In a separate bowl, whisk the eggs, buttermilk, and melted butter. Pour the wet ingredients into the bowl of dry ingredients, and stir to combine. Let the batter rest for 10 to 15 minutes.
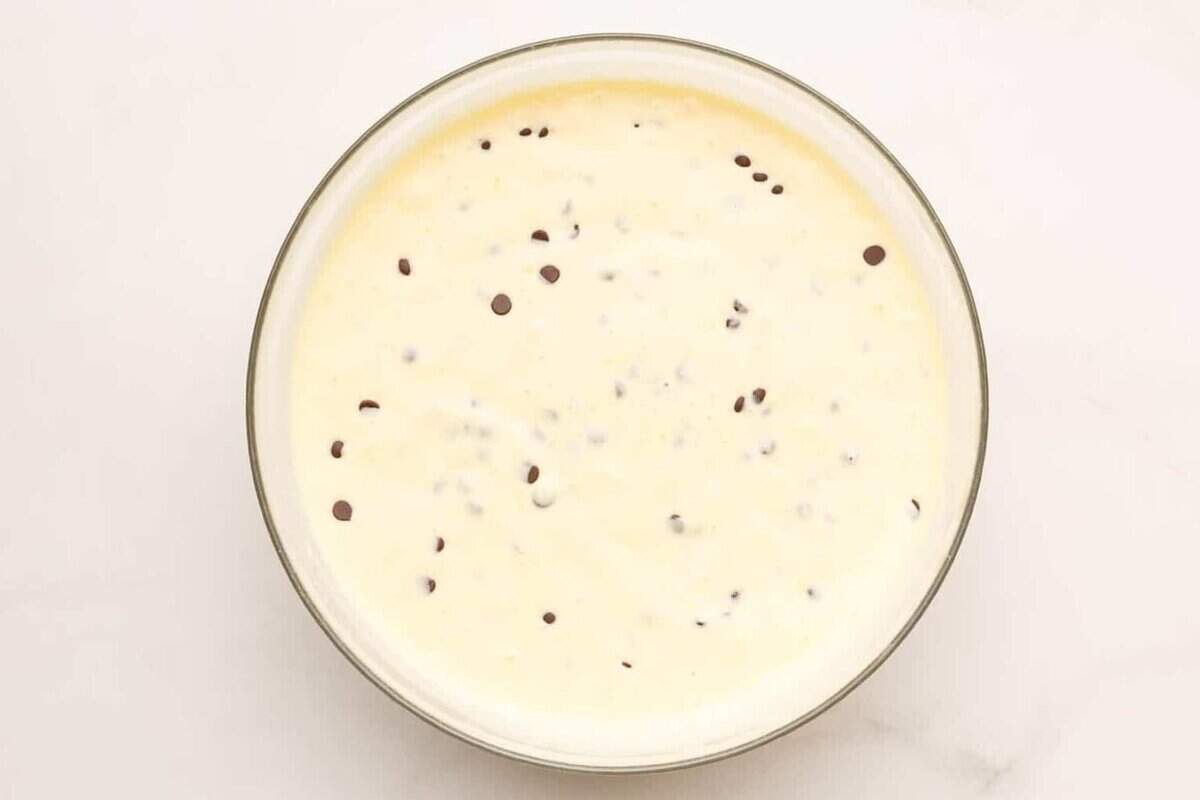
- Prepare: Preheat your waffle iron for about six to seven minutes, depending on the model. It may also be necessary to use a small amount of nonstick spray. Fold the chocolate chips into the batter.
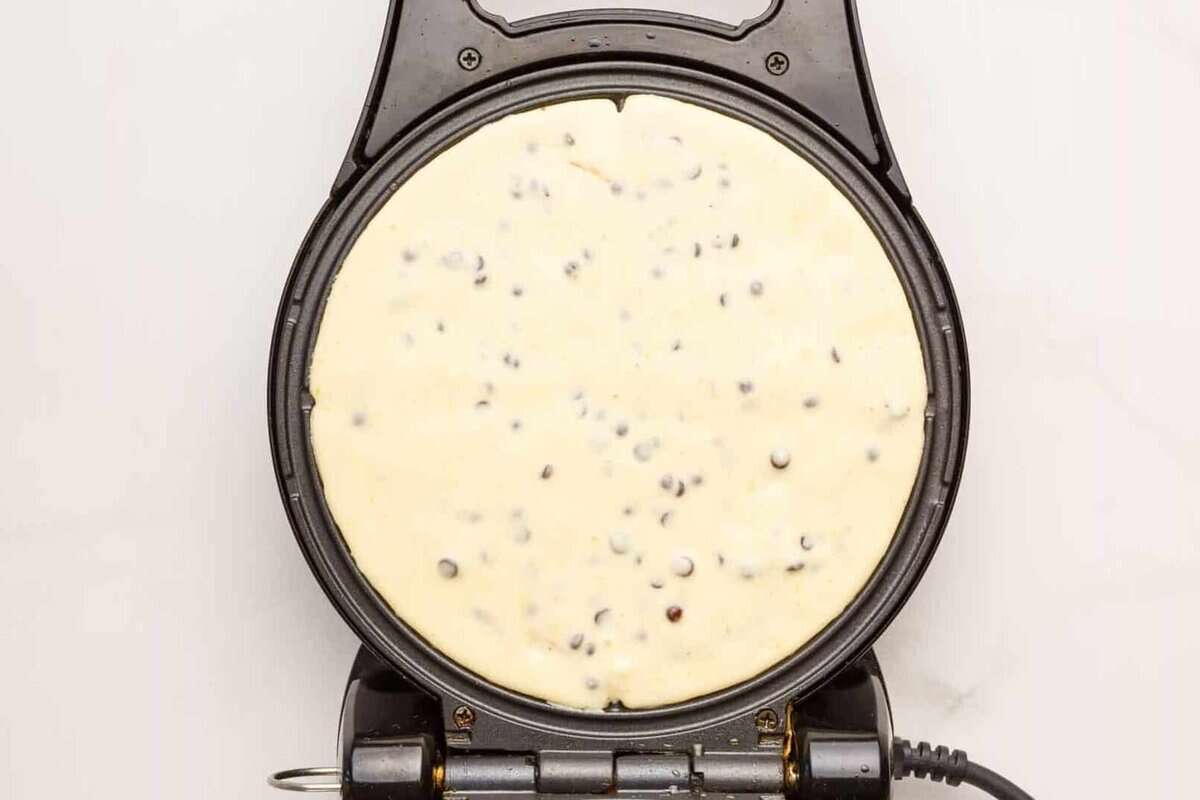
- Portion: Use a measuring cup to pour ½ to ¾ cup of the waffle batter onto the hot waffle iron.
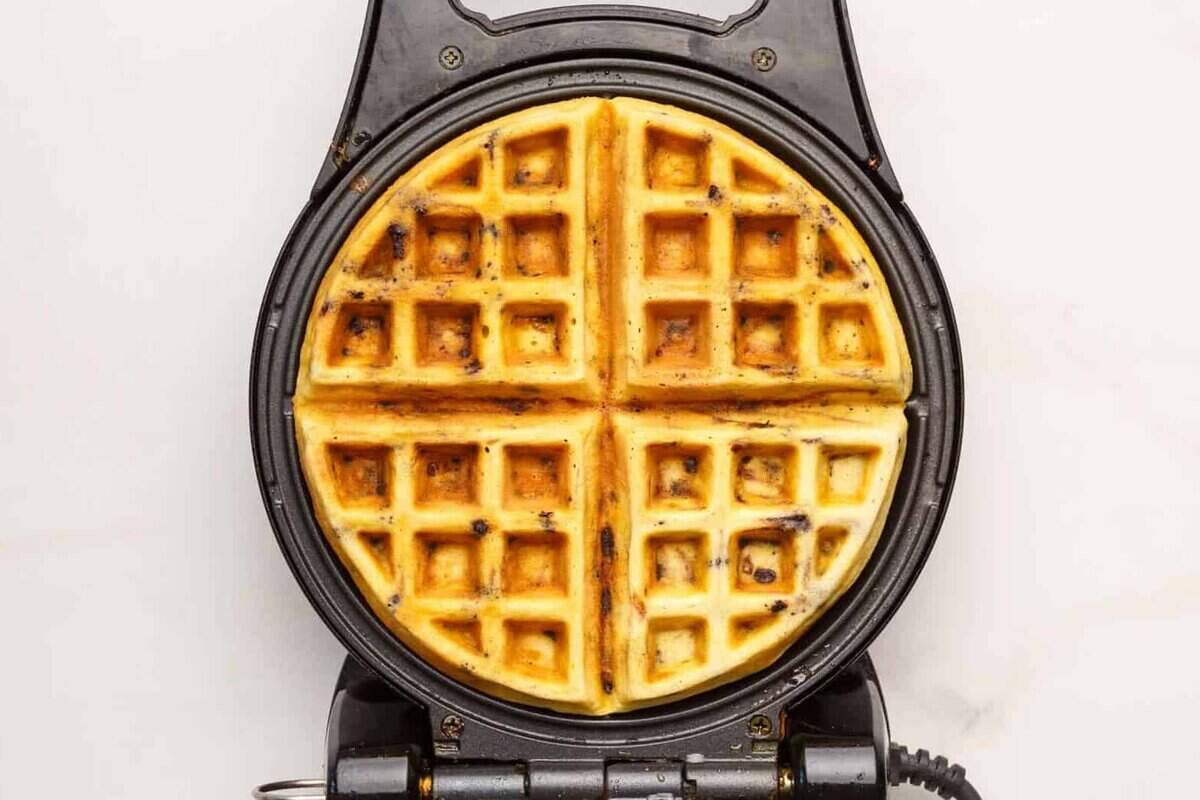
- Cook: Close the lid of the waffle iron, and cook for five to seven minutes or until the waffles are golden brown and crisp. Transfer the cooked waffle to a cooling rack. Then, repeat, using all the batter.
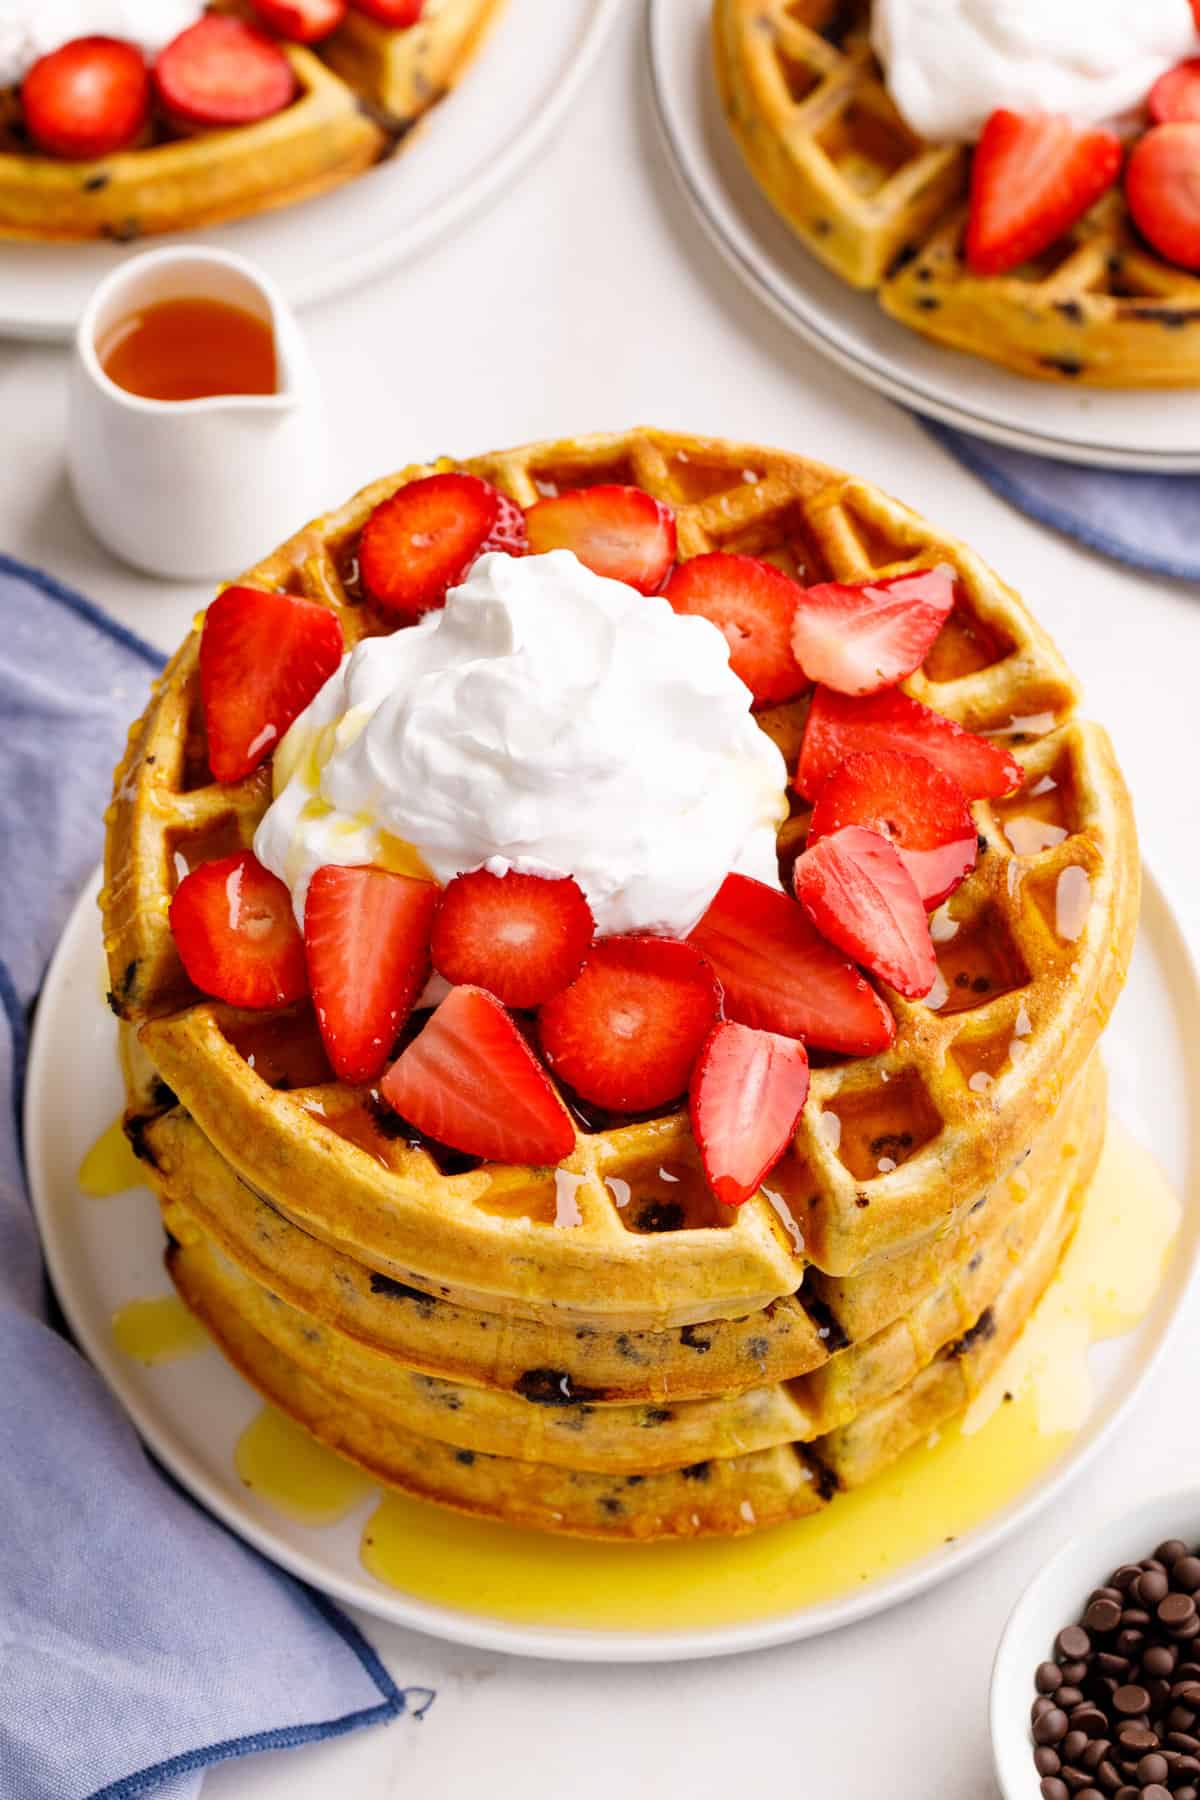
Serving Suggestions
- Traditional Toppings: Serve your waffles with butter, maple syrup, whipped cream, fresh berries, and/or powdered sugar.
- More Toppings: You can also try something creative, like peanut butter and banana slices!
- Sides: Enjoy your waffles with a side of scrambled eggs or crispy bacon to balance out the sweetness.
How to Store + Reheat
- Store leftover waffles in the fridge for up to one week. Wrap them in plastic wrap, and transfer them to a sealable bag to keep them fresh. Or store in an airtight container.
- Freeze your chocolate chip waffles for up to three months. Arrange the waffles on a baking sheet, and freeze until solid. Then, transfer them to a sealable bag, and store them in the freezer.
- Reheat waffles thawed or frozen in the oven, toaster oven, or microwave.
Frequently Asked Questions
Mini chocolate chips work best because they melt evenly and are less likely to burn.
Yes! They store and freeze very well, making them great for meal prep.
Keep cooked waffles warm in a low oven and avoid stacking them.
Absolutely. Freeze fully cooled waffles and reheat in a toaster or oven.
Try These Reader Favorite Waffle Recipes Next!
Waffle Recipes
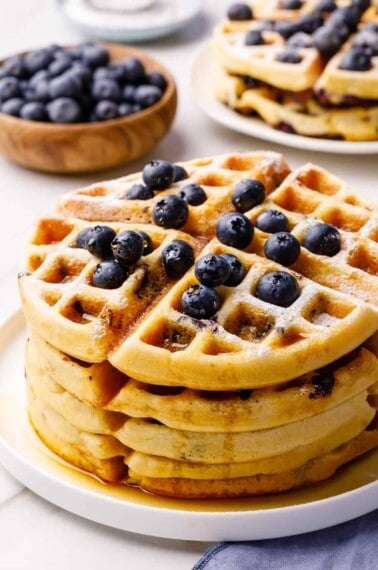
Blueberry Waffles

Waffle Recipes
Red Velvet Waffles

Waffle Recipes
Banana Waffles
Waffle Recipes
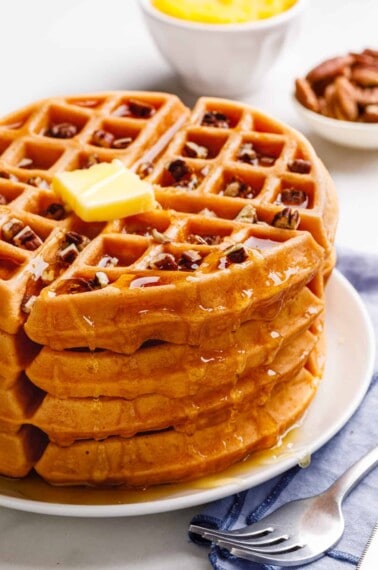
Bisquick Pumpkin Waffles
💌 Love easy recipes? Join my newsletter and get my Top 10 Reader-Favorite Recipes eBook FREE! Sign up here.
Need help with this recipe?
Click the buttons below to summarize it, adjust for diets, swap ingredients, or ask your own questions!
Chocolate Chip Waffle Recipe
Equipment
- 2 Mixing bowls
- 1 Waffle iron
Ingredients
- 2 cups all purpose flour
- 2 tablespoons brown sugar
- 1 ½ teaspoons baking powder
- ½ teaspoon baking soda
- ½ teaspoon kosher salt
- 2 eggs
- 1 ½ cups buttermilk
- ½ cup unsalted butter melted
- 1 cup chocolate chips (miniature is preferable)
Serving Suggestions:
- Maple Syrup
- Whipped Cream
- Fresh Berries
- Powdered Sugar
Instructions
- In a medium sized mixing bowl, whisk together the flour, sugar, baking powder, baking soda and salt.2 cups all purpose flour, 2 tablespoons brown sugar, 1 ½ teaspoons baking powder, ½ teaspoon baking soda, ½ teaspoon kosher salt
- In a separate bowl, whisk together the eggs, buttermilk, and melted butter. Pour the wet ingredients over the dry ingredients and stir together until just combined. It is okay if there are still some small lumps in the batter. Let rest for 10 to 15 minutes.2 eggs, 1 ½ cups buttermilk, ½ cup unsalted butter
- Preheat your waffle iron, about 6 to 7 minutes depending on the model. It may also be necessary to use a small amount of nonstick spray.
- Gently stir the chocolate chips into the batter. Pour ½ to ¾ cup portions of batter into the waffle iron (or the amount recommended by your waffle iron’s manual), close the lid and cook until golden brown and cooked through, about 5 to 7 minutes. Serve with maple syrup, whipped cream, fresh berries, and powdered sugar, if desired.1 cup chocolate chips, Maple Syrup, Whipped Cream, Powdered Sugar, Fresh Berries
Notes
- Preheat your waffle iron fully before cooking. A properly heated waffle iron helps the batter start cooking immediately, which is key for crisp edges and waffles that don’t stick.
- Don’t overmix the batter. Stir just until the dry ingredients are incorporated; a few small lumps are totally fine and will give you lighter, fluffier waffles.
- Add chocolate chips after the batter is mixed. Folding them in at the end helps prevent overmixing and keeps the chips evenly distributed instead of sinking to the bottom.
- Use mini chocolate chips if you want even coverage. Smaller chips melt more evenly and make sure every bite gets a little chocolate without overwhelming the waffle.
- Let cooked waffles rest briefly on a wire rack. Placing them directly on a plate can trap steam and soften the exterior, while a rack helps keep them crisp until serving.
- Keep waffles warm in the oven if cooking in batches. A low oven (around 200°F) is perfect for holding waffles without drying them out while you finish the rest.


Chocolate chip waffles are such a fun twist on the classic—perfect for a tasty, homemade breakfast!
Such a quick way to upgrade waffles!
This looks absolutely delicious!
Quick, easy, and delicious—what more could I ask for?
So easy, so good. My kids cleaned their plates—no leftover!