This post may contain affiliate links. Please read our disclosure policy.
After years of making my own pies from scratch, I’ve perfect how to make a perfect pie crust! Read on for my best tips on making a buttery, flaky crust to bake all your favorite fillings.

Tried-and-True Tips for a Perfectly Flaky Pie Crust
The tricks for how to make a perfect pie crust aren’t complicated—but they are things that a lot of beginning bakers don’t know because it’s not information included in every pie crust recipe.
Consider this your ultimate guide to creating a gloriously buttery, flaky crust. The kind that’s just as good as the filling—and that won’t be scraped into the trash can after everyone’s done eating their dessert!
1. Use Cold Ingredients
If your butter is soft and on the verge of melting, your pie crust may already be doomed.
Cold butter is the secret weapon for flaky, tender pie crusts. When you use cold butter, it layers into the dough in pieces rather than blending in completely. When you bake your crust, tiny little pockets of butter melt within the crust, creating layers of flaky magic.
While butter is the number one essential ingredient to that should be used cold, you can chill everything from your flour to your water and even your mixing bowl. Cold ingredients mean a perfect flaky pie crust.
2. Butter vs. Shortening vs. Both

There’s an ongoing pie-world debate over butter vs. shortening. This is a debate that may never be settled! Many people have preferences about whether to use butter or shortening when making pie crust or a combination of both. But here is my insight:
- Butter = Flavor and Flakiness
- Shortening = Tenderness and Structure
- Both = A Gorgeous Hybrid of Flaky and Tender
If you don’t want to use both, I recommend going with butter. But like I said: this comes down to personal preference!
3. Don’t Overmix the Dough
Always remember that you are making delicate, tender pie crust, not chewy bread. The more you mix your dough, the more gluten develops and the tougher it gets. And nobody wants a dense, chewy pie crust!
Once the dough starts coming together and looks like shaggy little clumps, stop mixing! Gently gather it into a disk, wrap it, and chill it. The end!
4. Rest the Pie Dough in the Fridge
Pie dough needs some time to rest and chill after being mixed. Remember how I said cold ingredients are best for making pie crust? This step not only keeps things cold but also lets the dough relax and soften after being mixed.
Try to let your dough rest in the fridge for at least one hour after mixing. The gluten in the flour will soften, and the butter will firm up. You will end up with a crust that’s easier to roll and flakier once baked.
Resting also helps prevent the pie crust from shrinking in the oven. Nobody wants a crust that pulls away from the pan and shrinks down to nothing!
5. Roll Like a Pro

When it’s finally time to roll out your pie crust, always remember to work from the center out and rotate the dough every few rolls. This will help the crust maintain a circular shape, keep an even thickness, and prevent the dough from sticking to the counter.
If your pie dough cracks while you are rolling, simply press it back together gently. It’s not going to ruin your crust! Pie crusts are forgiving, and besides: the rustic look is in!
6. Don’t Skip the Second Chill
Is your crust all rolled out? Is it looking beautiful in the pie pan? Lovely. Now chill it again before baking. About 15–30 minutes in the fridge helps lock in the shape and firm the butter up one last time before the heat of the oven hits.
While your pie crust is chilling, preheat the oven so it’s ready when your crust is.
7. Blind Bake the Pie Crust With Weights
Blind baking (baking the crust without filling) is essential for pies with creamy fillings that don’t need to be baked, like chocolate cream pie or banana cream pie. But don’t just toss your dough in the pie plate and put it straight into the oven! It will puff, bubble, and probably shrink, leaving you with a big disc of cooked dough.
Instead, line your unbaked crust with parchment paper or foil and then fill it with ceramic pie weights, dried beans, or even rice. You can really use anything heavy that’ll keep the crust from poofing up.
8. Egg Wash Your Pie Crust

Want a pie crust that looks like it came out of a high-end pastry shop? All you need to do is brush the top with an egg wash. It gives your crust a golden, shiny, bakery-style finish.
Beat one egg with a splash of milk or cream and a pinch of salt. Brush the mixture lightly onto the crust using a pastry brush before baking. That’s all there is to it!
Egg wash can also help prevent the pie crust from getting soggy under heavy, wet fillings. Many pastry pros swear by that thin layer of protective egg wash, and I happen to agree! This is a must when making fruit pies like blueberry pie or peach pie.
9. Use the Right Pie Dish
Glass, metal, ceramic—it can be hard to choose! Your pie dish actually does make a difference when it comes to baking the perfect pie crust. Here’s a quick look at each type and why you may want to choose one over the other.
- Glass pie dishes let you peek at the crust to check for doneness.
- Metal pie pans heat up quickly and will give you a crispier bottom crust.
- Ceramic pie dishes are great for even baking, but can definitely take a bit longer to heat up.
I am a big fan of ceramic pie dishes, as they cook evenly every time. They also look beautiful, making your homemade pie a true centerpiece dessert.
Definitely try to avoid nonstick pans when making pie crust, as they can interfere with the browning and make your crust sad and pale. No one wants that!
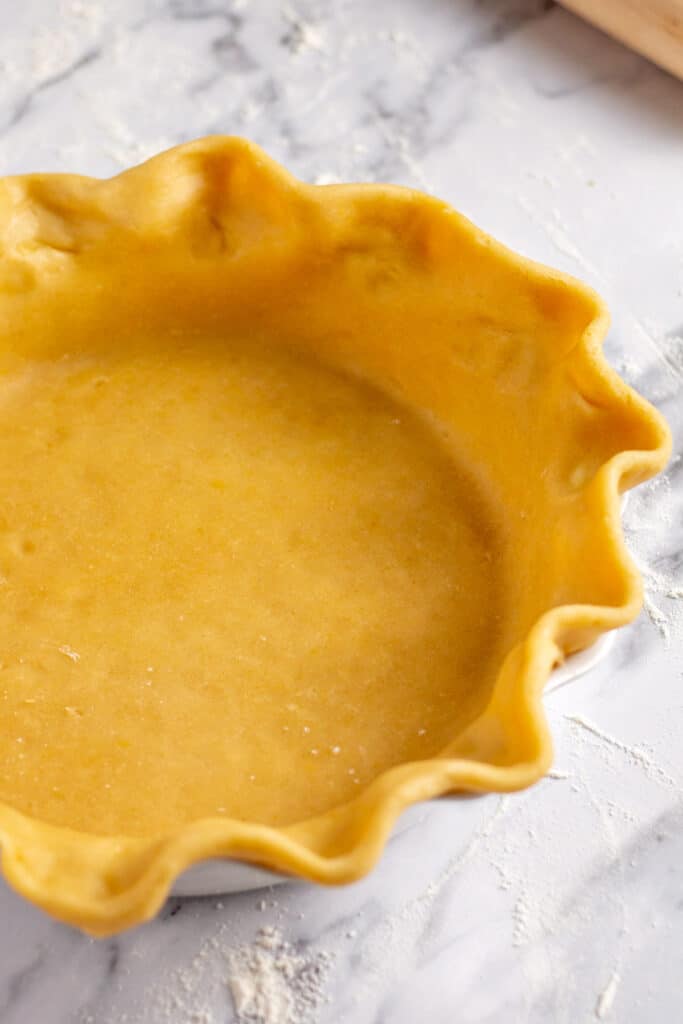
10. Crimp the Top of the Pie Crust

A good crimp holds your filling in and gives your pie that cozy, homemade charm. Use your fingers, a fork, or even the edge of a spoon to flute the edge of your pie crust.
I always use my fingers, which you can do by pressing the top edge of the uncooked pie crust between your thumb and two fingers. Easy and beautiful! This little touch will help turn your basic crust into a perfect pie crust; it also looks a little more polished than using the tines of a fork.
Making a Perfect Pie Crust: Your Big Takeaways
Alright, so you’ve chilled, mixed, rolled, and crimped like a pro. Here’s your last little cheat sheet:
- Cold Ingredients = Flaky Crust
- Don’t Overmix = Tender Crust
- Chill, Then Chill Again = Structure
- Blind Bake = No Soggy Bottoms
- Egg Wash = Golden Crown
It’s time to head to the kitchen, channel your inner pastry chef, and go make a pie crust that people will rave about. You have all the tools and tips you need to make the perfect pie crust!