I love to bake. I’m pretty sure that if you know me in real life or on my blog, you know that about me. So, I’m always looking for new desserts to try that are 1. Beautiful and 2. Delicious.
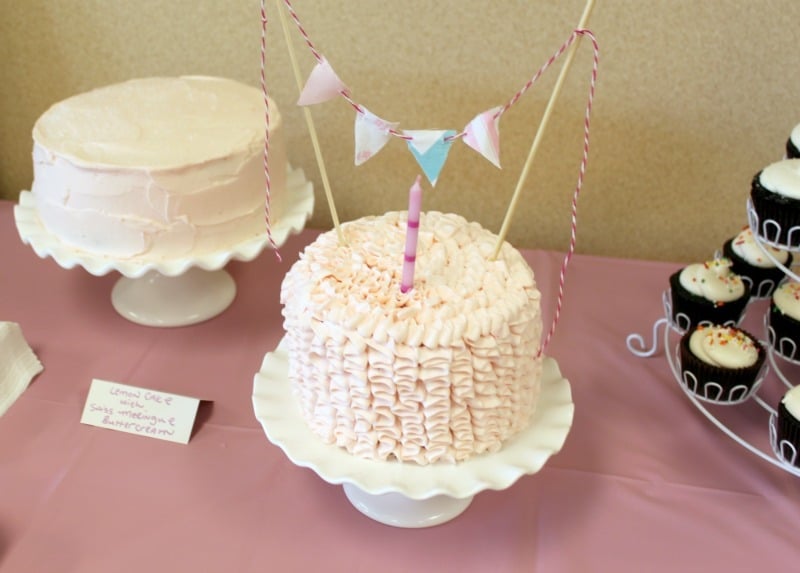
This year for Sydney’s 1st Birthday Party, I wanted to make her a cake that was special. Of course, I searched Pinterest for inspiration (does anyone look anywhere else these days?!) and immediately knew what I wanted to make – A Pink Ruffle Cake!! But, I had never made anything like this. I usually make a smooth cake or something a little more “homemade” looking. This was going to require talent – or so I thought.
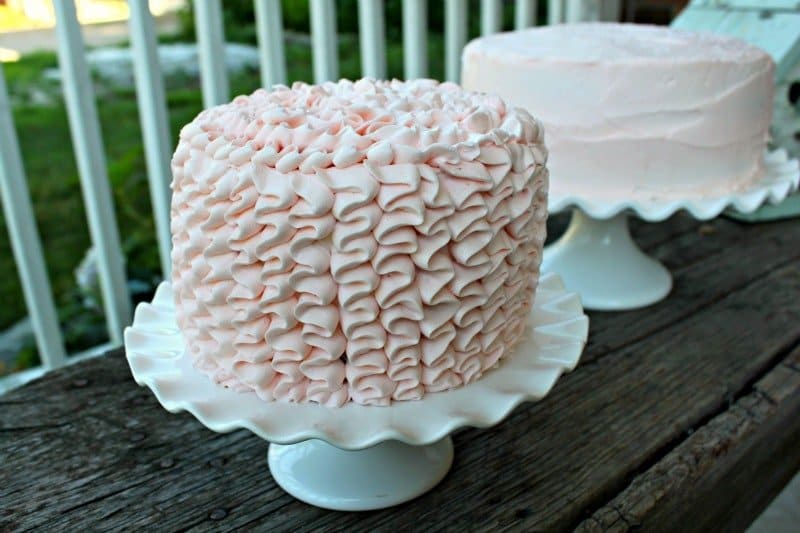
To my surprise, this cake was a lot easier to accomplish than I thought it would be! After a couple of YouTube videos and Blog Posts, I was ready to give it a shot! I even made it with a very pale pink Swiss Meringue Buttercream that I had NEVER tried to make. Boy, I am glad I did! This frosting is my new favorite to make! It came together beautifully and held up well while I was preparing the cake for decoration. I even read that you can keep it out on the counter all day and it will stay the same. I figure this is true as long as your house isn’t too hot. I would say if you have your air on, you’re good to go! You can also make this up to 3 days ahead of time and keep in the refrigerator – just whip it up with your mixer when you are ready to use it.
If you follow these easy step-by-step directions when making you’re own cake, you’re sure to have success!
* I used a six inch cake pan to make this cake. I made a white layer and a pink layer – then I cut each of those layers in half to make four layers and I alternated the layers on the cake plate. I did not use a cake cutter, but this is on my list for my next trip to the store! My serrated bread knife did just fine, but I would like to have a tool to make it easier! TIP: refrigerate your layers before you cut them – it makes for a cleaner cut.
* First I grabbed my cake plate and added a dollop of frosting in the center of the plate before putting the first layer down. This holds the cake in place while you’re decorating. Next, I added the first layer and iced the top of it. Then, the next layer and iced the top and then the next and so on until all the layers were on the plate and a nice even coat of frosting was in-between each layer.
* Then I gave the entire cake a crumb coating of frosting to keep the crumbs down and to give the frosting something to adhere onto. Plus, you may see a little of the frosting in-between your ruffle rows. I stuck it in the fridge while I got my piping bag ready to decorate to give it a little time to firm up.
* Next, I filled my frosting bag with the buttercream and a Wilton tip #103. You could use a bigger rose tip – but I liked the look of smaller ruffles to make the cake a little cleaner and polished looking. This was just my preference. If I make a bigger cake – I would use a bigger tip. Up to you! Now, you’re ready to decorate!
* Starting at the bottom of your cake, hold your frosting bag with the tip down and the SMALL side of the tip facing the cake and the larger side pointing at you. Apply even firm pressure to the bag and apply the frosting in a left to right motion – back and forth – as you pull it UP toward the top of the cake. Don’t stop until you get to the top of the cake – and then gently stop and pull away. You don’t have to be fast at making the ruffles, but it is important not to stop so that you have one beautiful ribbon on the side.
* Next, come right beside your first row of ruffles, at the bottom of the cake and start the next ruffle – left to right – back and forth – until you get to the top of the cake. Stop. Pull away and do the whole thing again around the entire cake!
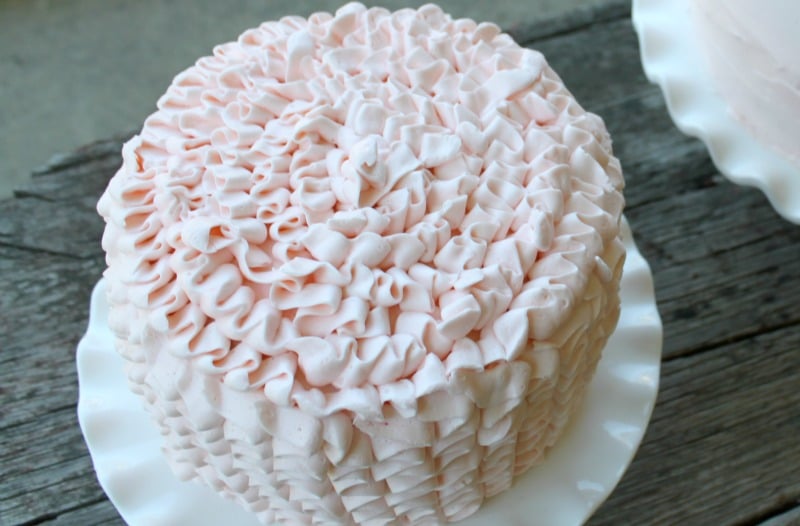
* When the entire cake is covered, you’re ready to do the top. You’ll want to start at the very outside edge of the cake and cover up where you stopped and pulled away to start your next row. This just makes it pretty. This time you’ll need to hold your bag with the small end of the point facing the OUTSIDE of the cake and you’ll make a back and forth motion around the top of the cake. Stopping and starting another row once a whole row is completed.

That’s it! I know that it sounds like a lot – but it’s really not! You can do it! I promise!


I have got to make this cake!
I read your directions and watched a few videos- now I just gotta find a reason- no parties coming up, lol!
Thanks for the idea:-)
You rocked that cake! It’s gorgeous and would work for any occasion.
THANK YOU, Whitney!!! I am so excited about this cake and it really tasted as good as it looked!!